Bank Reconciliation and Management with Gridlex Sky: Step-By-Step Process
Published | Aug. 22, 2023, 12:17 p.m.
Gridlex Sky can help businesses manage their bank reconciliations. The purpose of bank reconciliation is to ensure that the cash balance reported on the company's balance sheet is correct. This process is necessary because there is often a difference between the cash balance reported on the company's books and the actual cash balance in the bank account. With Gridlex Sky, users can reconcile their bank accounts in a few minutes, check balance mismatches, categorize and filter details, and many more.
| If you need any help with any feature, data migration of your old accounting data, questions on Chart of Accounts (COA) or anything at all, just email apps@gridlex.com, and our team of expert accountants will be here to help you. Remember, that one of Gridlex’s core values is Customer Success. We want you to be successful. |
Bank Reconciliation in Gridlex Sky
Step 1: Login into your Gridlex App Suite Account and choose the entity of your choice. Go to the “Banking” section.

Step 2: Click on “Add Bank or Credit Card” present on the right side of the screen. Select the Bank for which you want to sync the transactions.

Step 3: Provide Internet Banking Customer ID and Password. Submit for the authentication once done.

Step 4: Once it is approved, Bank accounts will be added automatically and all the transactions will be synced to the Gridlex Sky accounting software. To view the details of the uncategorized transactions, click on the “Transactions” present in the uncategorized tab.

Step 5: To Match Bank Statement, you can click on “Match”.

Step 6: Here, you can view Statement Balance Total and Statement Balance Available. In addition, you can filter the bank statement by mentioning the keyword, start data and end date.
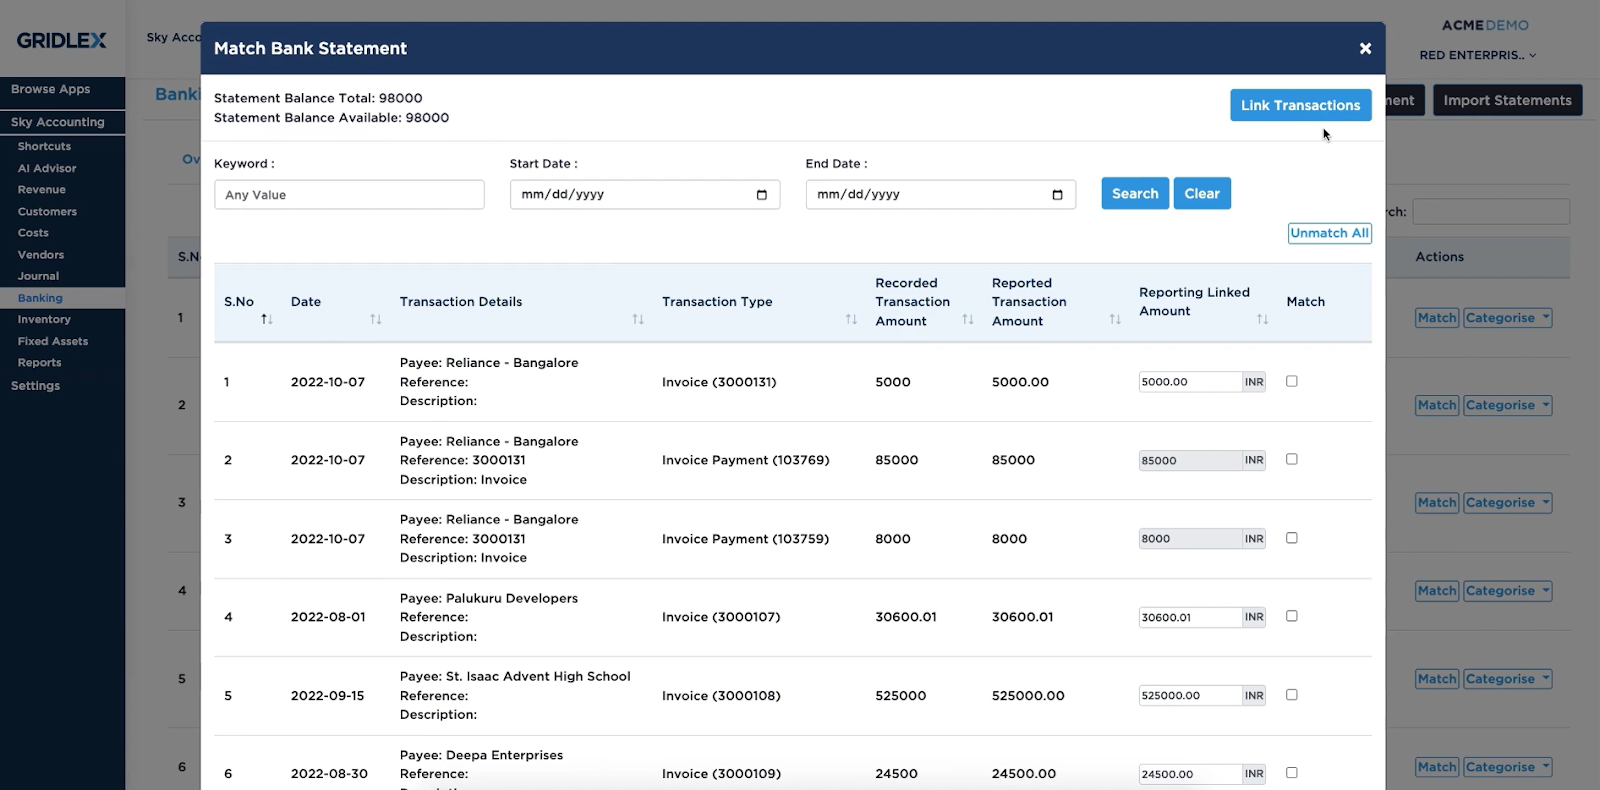
Step 7: Once done, click on “Link Transactions” to link all the transactions selected in the statement.

Step 8: Users also have the flexibility to categorize the transactions based on Customer Advance, Customer Payment, Transfer/Deposit from Another Account, Interest/Other Income, Expense Refund, and Owner’s Contribution.

Step 9: To view all the categorized transactions, click on “Categorized transactions”. Here, you can view a dropdown. Select “All”. After clicking, users can view a list of transactions. If not relevant, you can unmatch it by clicking on the “Unmatch” button.

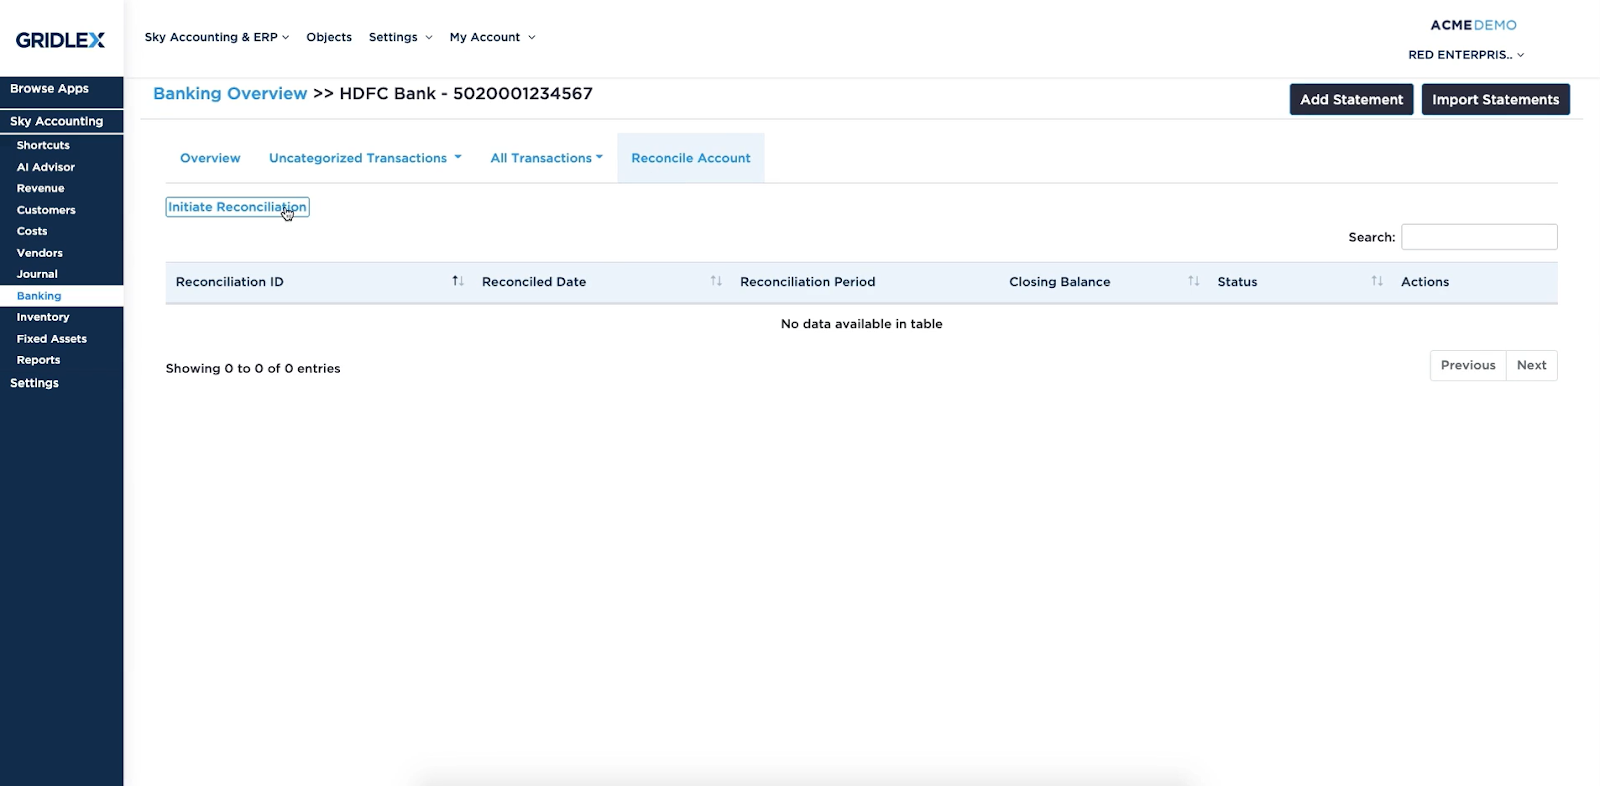
Step 10: To reconcile, click on “Reconcile Account”, click on “Initiate Reconciliation” to reconcile the data.
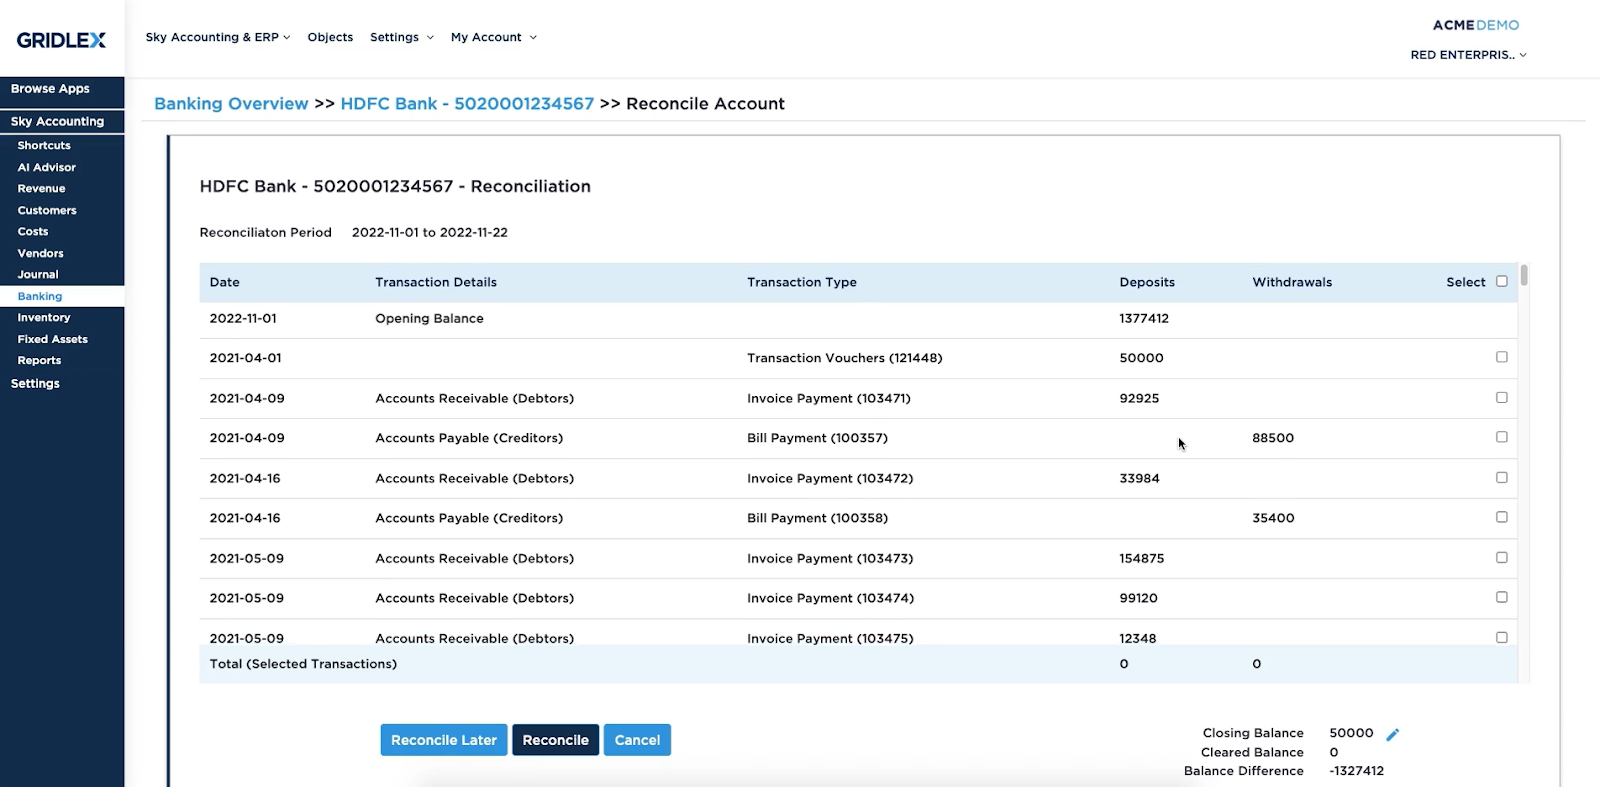
Step 11: Once you click on initiate reconciliation, you will be directed to this page. Here, fill in details like Start Date, End Date and Closing Balance. Once done, click on “Start Reconciliation”.

Step 12: Here, you can view the reconciliation data of the period entered. In addition, users have the option to reconcile the data later as well. Cleared Balance and Balance difference can be viewed at the end of the page.
Step 13: To add or import statements, click on “Add Statements” or “Import Statements”.

Step 14: Here, users can add their statements manually. They have to enter important details like the Transaction Type, Amount, Reference Number, Payee, and Description. Once done, click on the “Save” button.

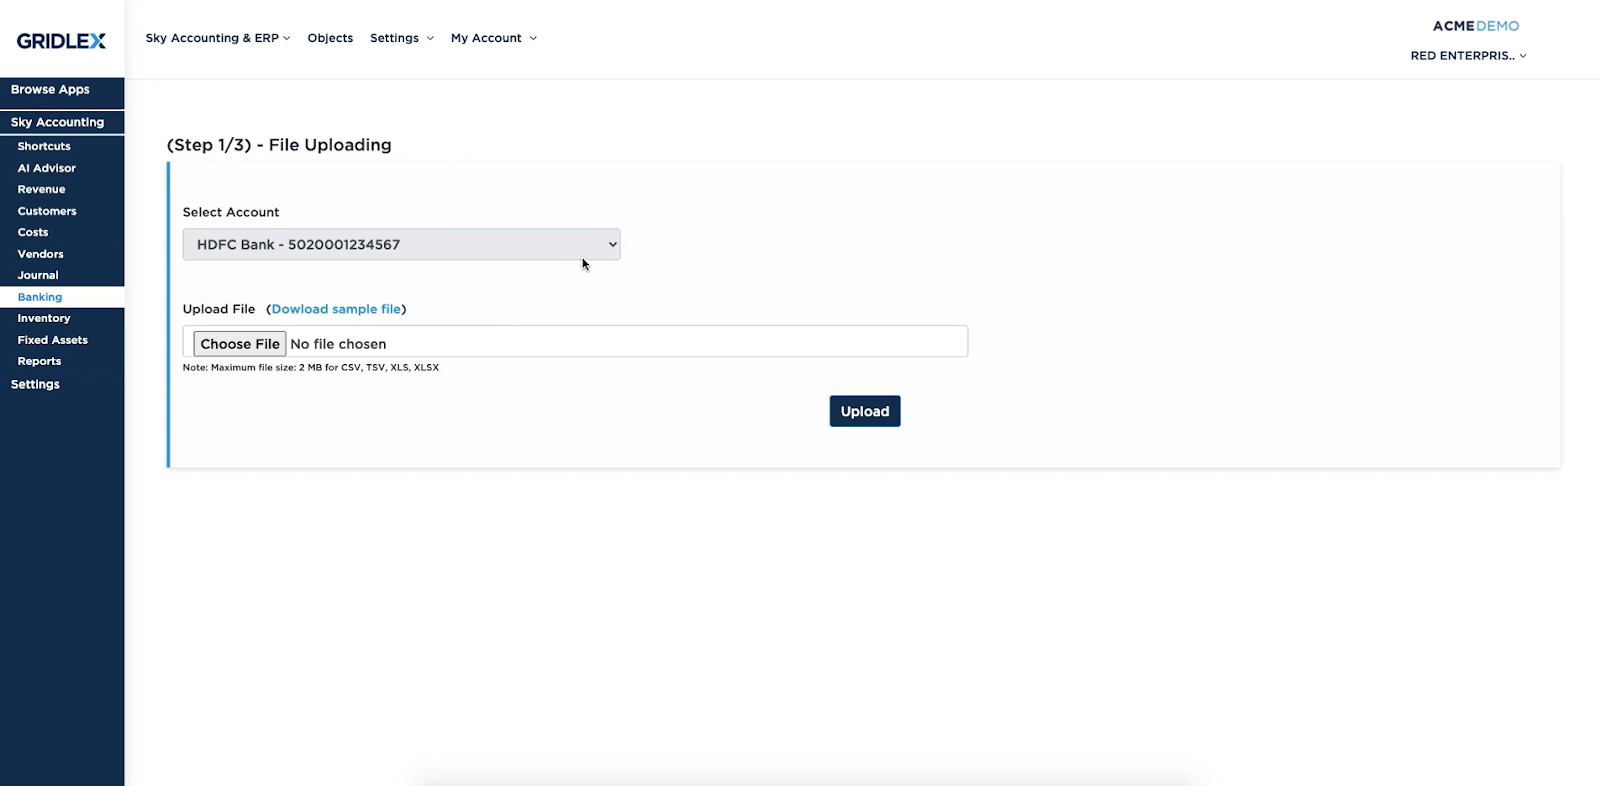
Step 15: To upload a file, click on “Import Statements”. Choose the file of your choice and click on “Upload” to transfer the data into the system.
Quick Tip
Gridlex Sky offers a list of shortcuts for common tasks. With the help of these quick shortcuts, users can easily navigate to the Banking page without having to scroll through other sections. Click on “Upload, categorize and reconcile your Bank Transactions” to go to the banking section with one click.
