How to Record the Purchase of a Fixed Asset in Gridlex Sky?
Published | Aug. 22, 2023, 1:22 p.m.
Fixed asset management register allow users to track and manage physical assets such as buildings, equipment, and land. This process includes the acquisition, depreciation, disposal, and maintenance of assets. Gridlex Sky offers a Fixed Asset Management Register which can help users to gain a comprehensive view of every fixed asset that has been owned or built by a company. With the help of Gridlex Sky Fixed Asset Management Register, organizations can keep track of their assets and ensure that they are being used efficiently and effectively. The software will allow users to maintain a record of all the assets, including purchase date, location, and value.
| If you need any help with any feature, data migration of your old accounting data, questions on Chart of Accounts (COA) or anything at all, just email apps@gridlex.com, and our team of expert accountants will be here to help you. Remember, that one of Gridlex’s core values is Customer Success. We want you to be successful. |
Fixed Asset Management Register in Gridlex Sky
Step 1: Login into your Gridlex App Suite Account and choose the entity of your choice. Go to the “Settings” tab in the side module bar and select the “Manage Items” option mentioned in the Invoice/Bill section.

Step 2: Here, click on Add/Edit Asset Group. Select the asset group of your choice i.e. tangible or intangible, mention the asset group name and parent asset group. Once done, click on the “Save” button.

Step 3: To check/edit existing asset groups, click on View Asset group from the top module. Here, you can edit the asset group by clicking on the “Edit” button mentioned in the Action section.

Step 4: To manage items, click on the “Manage Items” from the top menu bar. Here, you can view a list of existing items. To create a new item, click on “Add New Item”.

Step 5: Here, enter the mandatory fields like the Item Name, Item Type, Item Metric, Item Category, ITC Eligibility, Item Tax Preference, Description (if any), HSN/SAC Code, etc.
Note: Item Category should be Fixed Asset.

Step 6: In the Parent Section, select the required Item Metrics.

Step 7: In the Fixed Asset Section, enter the required information like asset group, nature of asset, fixed asset account, accumulated depreciation account, etc.

Step 8: In the Default Accounts Section, enter the required fields like creation debit account, payment credit account, payment debit account, etc. Likewise, fill in the mandatory details in the Bills Defaults section as well. Once done, click on “Create” to save the data.

Step 9: Go to the “View Entity Items” tab. Here, users can view a list of all the items. Click on any item name to view more details.

Step 10: Cross-examine the details. If there are modifications, fill in the fields wherever the change is required and click on “Update” to save the changes.

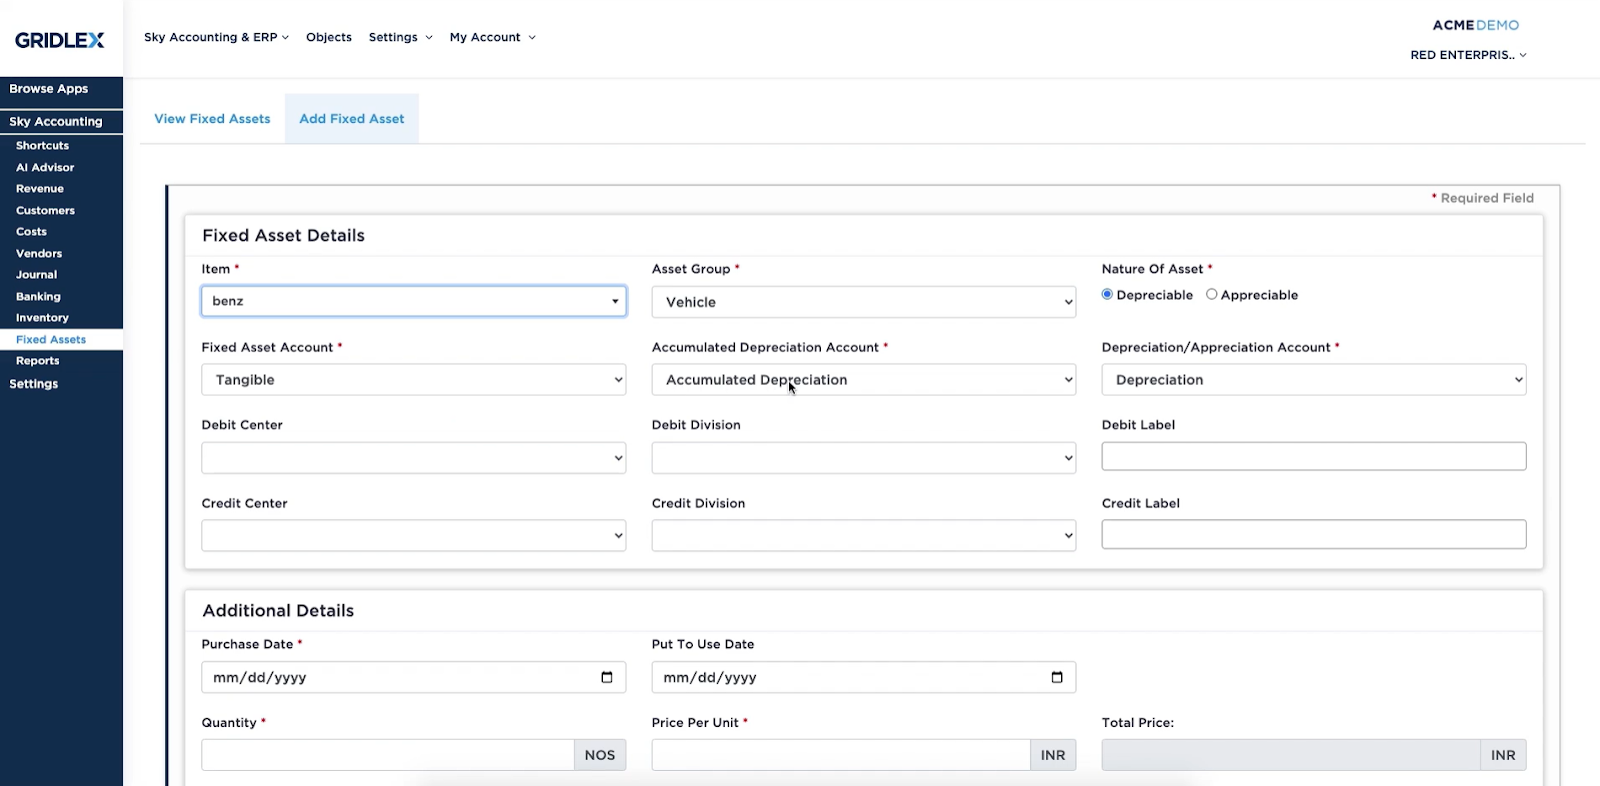
Step 11: Now, go to “Fixed Assets” in the side module bar. Click on “Add Fixed Asset”.

Step 12: Fill in necessary Fixed Asset details like Item Name, Asset Group, etc. Add additional details like Purchase date, quantity, description (if any), etc.
Step 13: Add Prior Accumulated Description Details (if any) and Prior Adjusted Amount Details (if any). Once done, click on “Save”. To revise the details, click on “Edit” in the “View Fixed Assets Section”. Make the required changes and “Save” once done.

Step 14: To view Fixed Asset Details, click on the “Asset ID”. Users will be redirected to this page. Click on the “ Fixed Asset Linked Entries” to view the linked entries.
Note: Users also have the flexibility to edit the details. Click on “Edit” to make required changes.

How to Link Entries for the Fixed Asset?
Step 1: Go to “Journal'' in the side module bar and select “Add Transaction” tab.
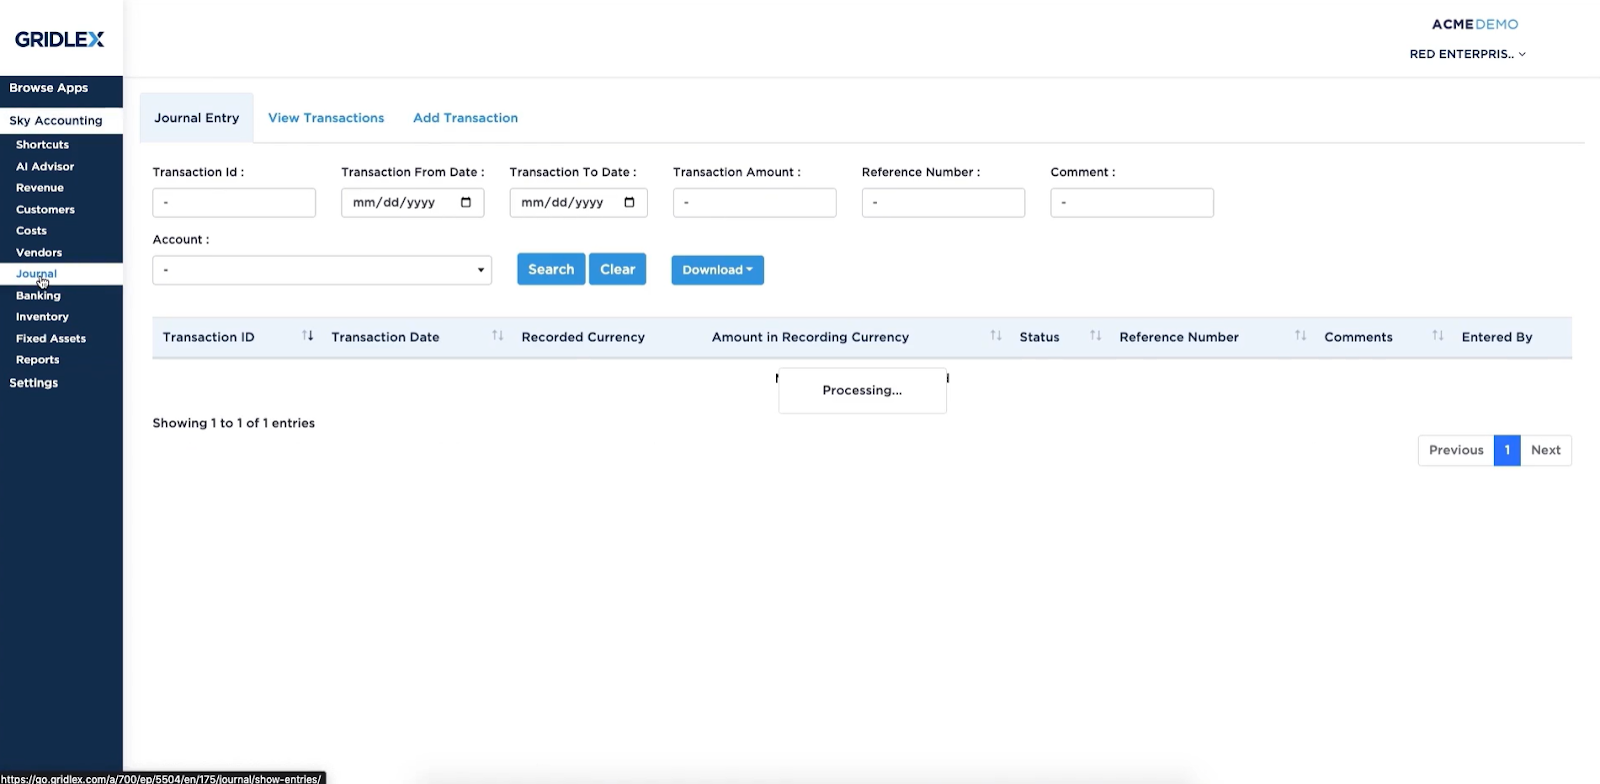
Step 2: You can see a few transaction templates like Salary Template, Manual Journal, etc. Click on “Manual Journal” and add the required details.

Step 3: Fill in the Transaction Detail Section with required debit and credit transaction entries. You can add multiple debit/credit transactions by clicking on the “Add Debit/Credit Transaction”. Once done, click on “Update” to save the transaction.

Step 4: Go to “Fixed Assets” in the side module bar and click on “Asset ID”.

Step 5: Click on “Fixed Asset Linked Entries”. Here, you can view all the linked entries.

Quick Tip
Gridlex Sky offers a list of shortcuts for common tasks. With the help of these quick shortcuts, users can easily navigate to account receivable and account payable page without having to scroll through other sections.
Click on “Manage Fixed Assets” to directly view the fixed assets data.
