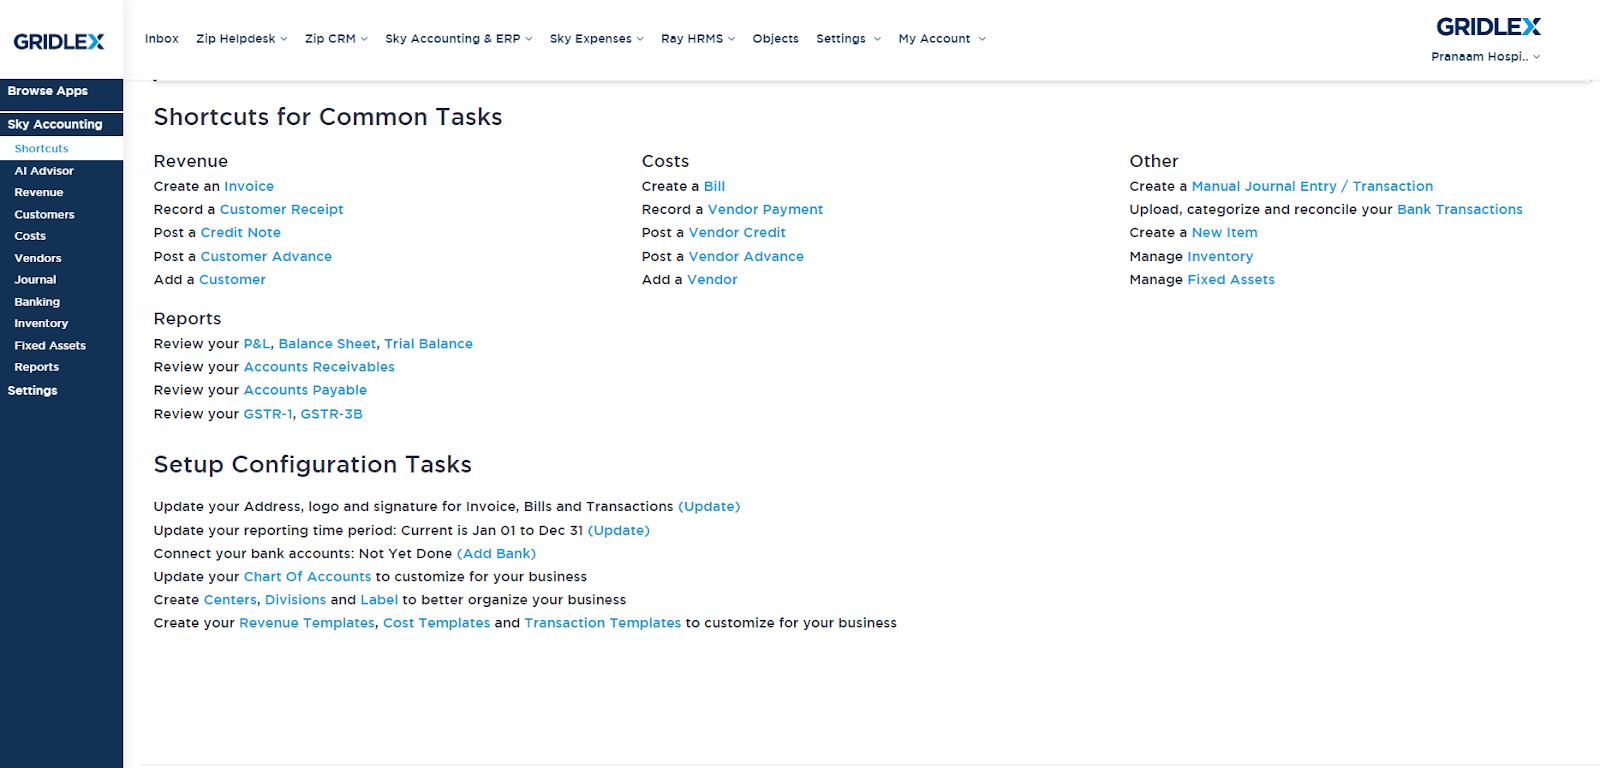
Create Centers, Divisions, and Labels to Better Organize your Business
Published | Aug. 22, 2023, 11:58 a.m.
Gridlex Sky allows you to view transactions, P&L Statements, account balances, and other reports by Center/Division/Label basis. This will help you to gain unparalleled insights to improve the revenue cycle. In addition, users have the flexibility to add sections/objects/fields to the list, which allows them to track the entire revenue & cost cycle in one place.
| If you need any help with any feature, data migration of your old accounting data, questions on Chart of Accounts (COA) or anything at all, just email apps@gridlex.com, and our team of expert accountants will be here to help you. Remember, that one of Gridlex’s core values is Customer Success. We want you to be successful. |
How to View Reports by Center/Division/Label Basis Creation of Centers
Step 1: Login into your Gridlex App Suite Account and choose the entity of your choice. Select the “Setting” tab and click on “Manage Centers.”

Step 2: Click on the “Settings” tab and go to the Expenses, Accounting & Financials Configuration section. Click on “Manage Centers.”
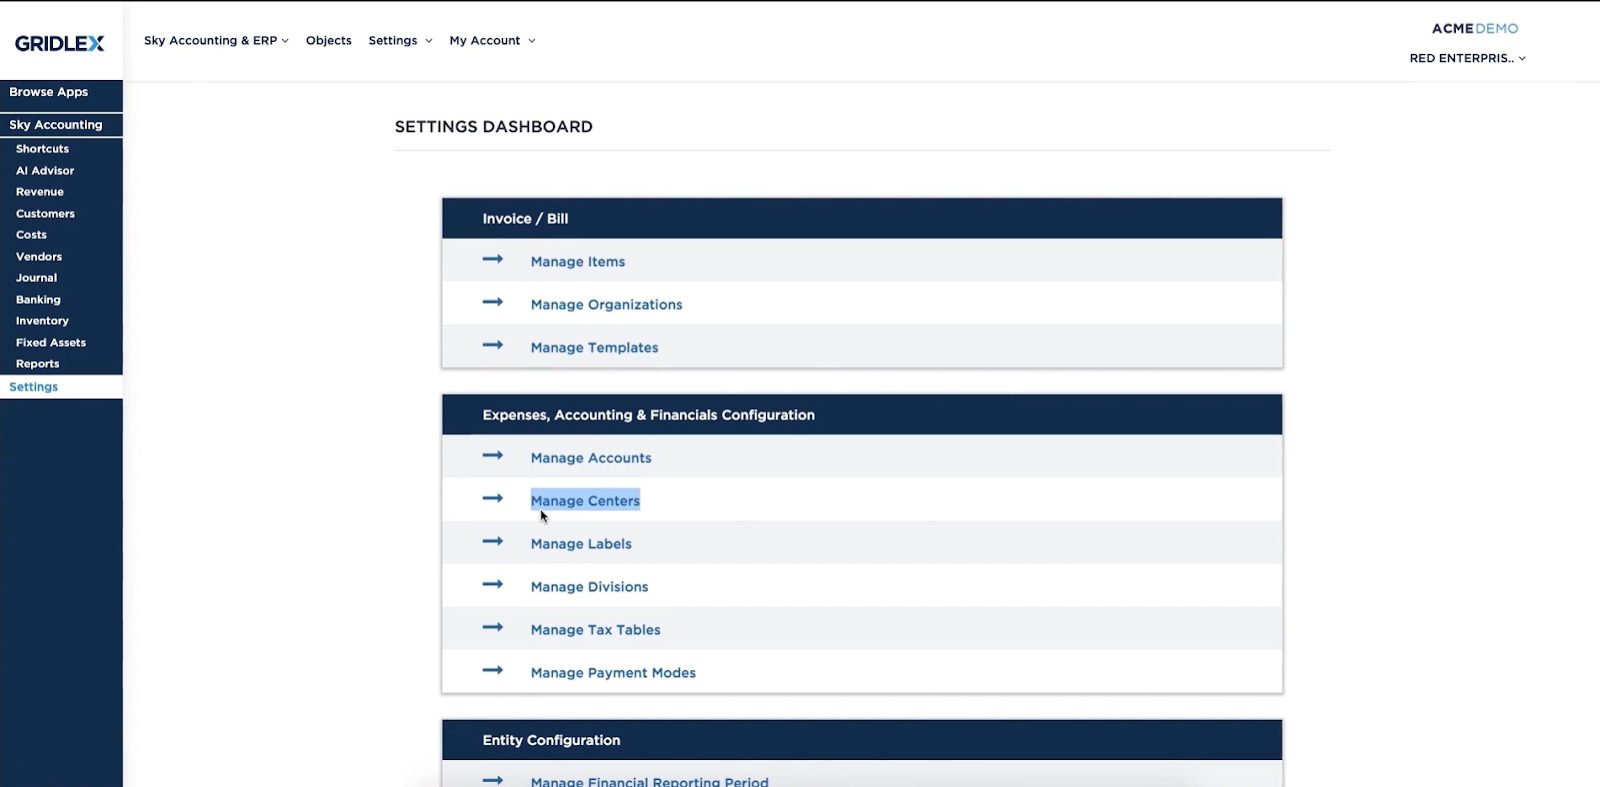
Step 3: Click on “Add/Edit Center Type” to add a center of your choice. Give the Center type name & Center type description. If you want to edit the center type, go to “Center Types” and click on “Edit” to revise the data. In addition, you can add multiple centers by clicking on the “Add Row” button.

Step 4: To view the complete list of Centers, click on the “Center List.” Once you have finished viewing the report, you can select the “Download” button to download the report in PDF format.

Creation of Labels Groups and Labels
Step 1: Login into your Gridlex App Suite Account and choose the entity of your choice. Select the “Setting” tab and click on “Manage Labels.”
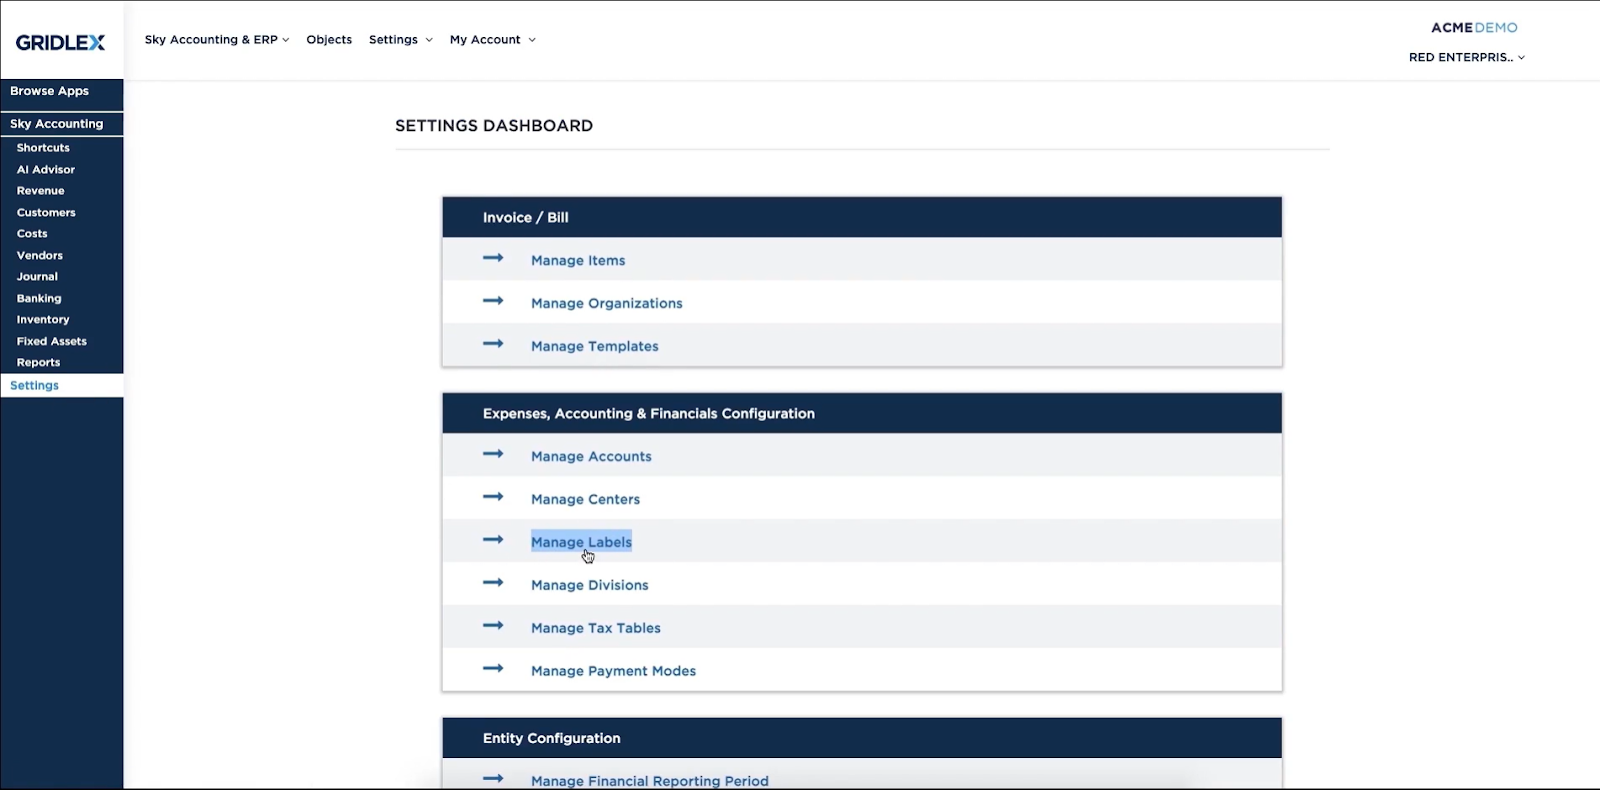
Step 2: Click on “Add/Edit Label Group Type” to add a label of your choice. Create a Label Group type name and Label Group type description. If you want to edit the group type, go to “Label Group Type” and click on “Edit” to revise the data.

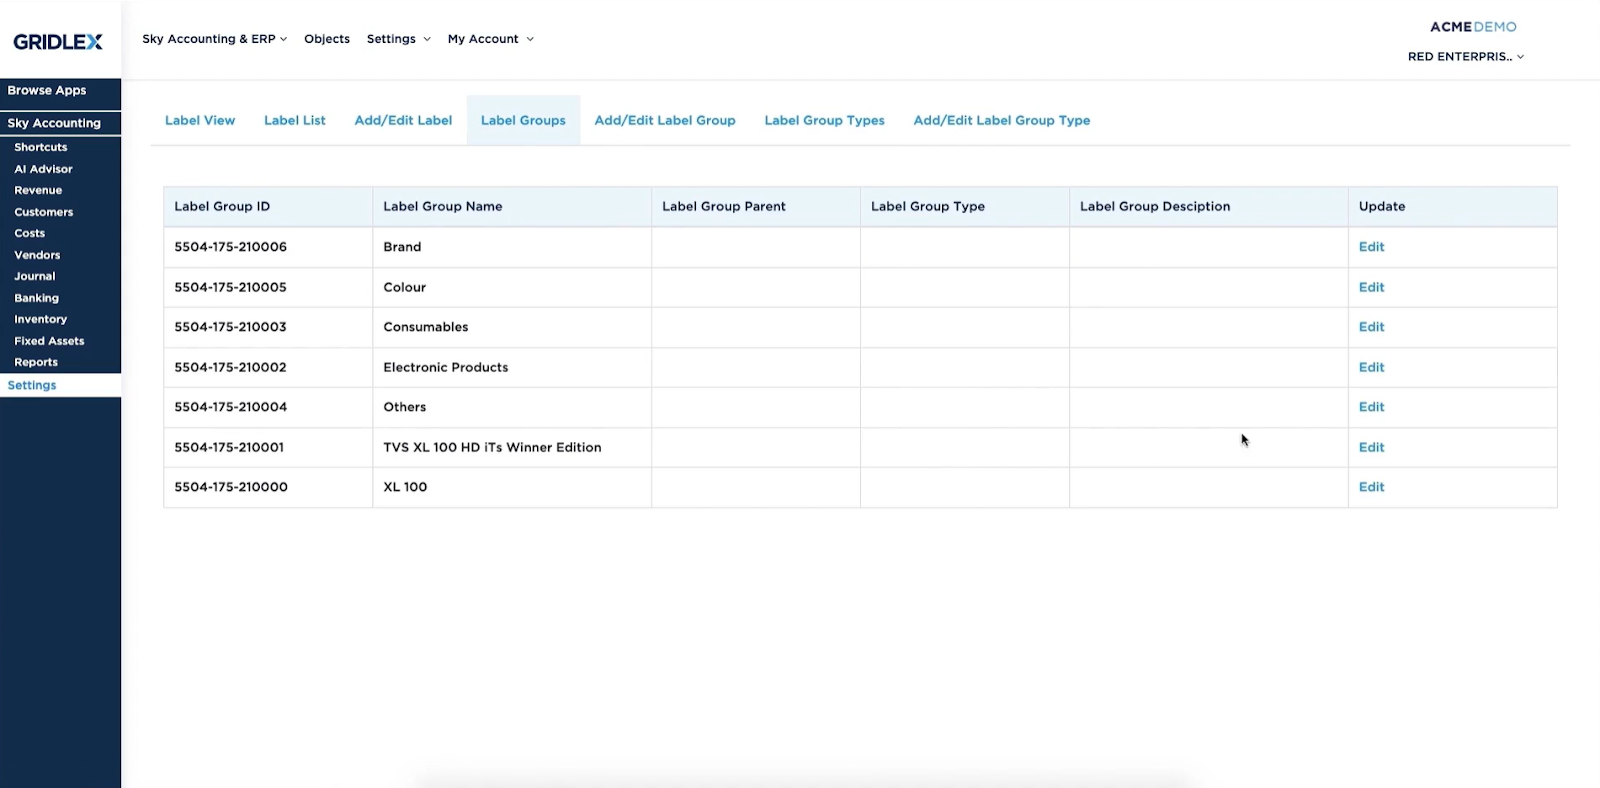
Step 3: Add label groups by clicking on “Label Groups.” Here, create a label group name, label group description, select label group parent, and type, then click on the save button. Click on “Edit” if you want to revise the data mentioned in the Label Group.
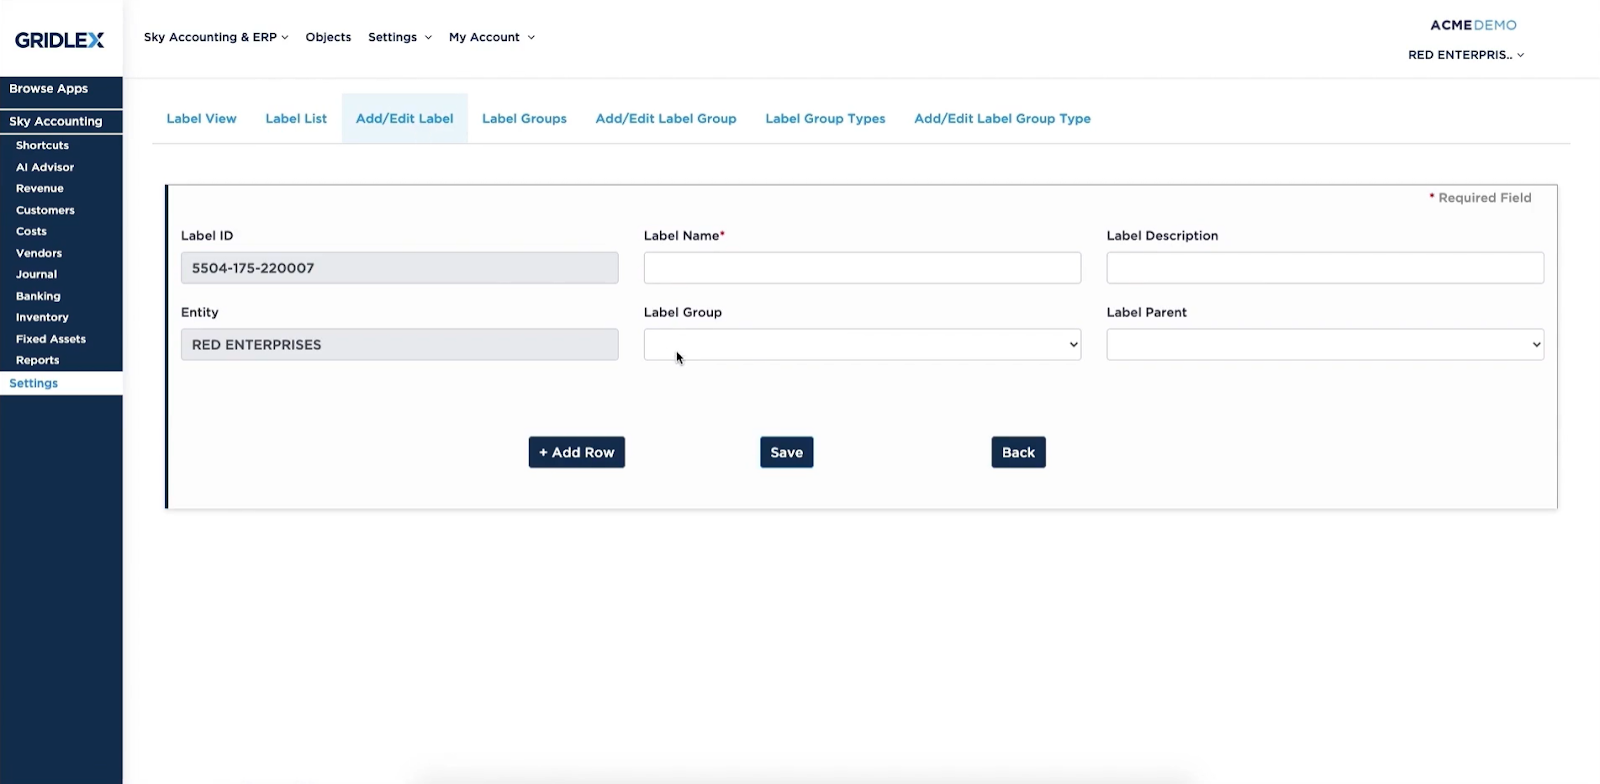
Step 4: Add a label to your data. To add a label, click on “Add/Edit Label” and save the data once done. You can add multiple labels by clicking on the “Add Row” button. To edit or view the complete list of labels, click on the “Label List.” Users also have the flexibility to update the data mentioned in the labels by clicking on the “Edit” button.
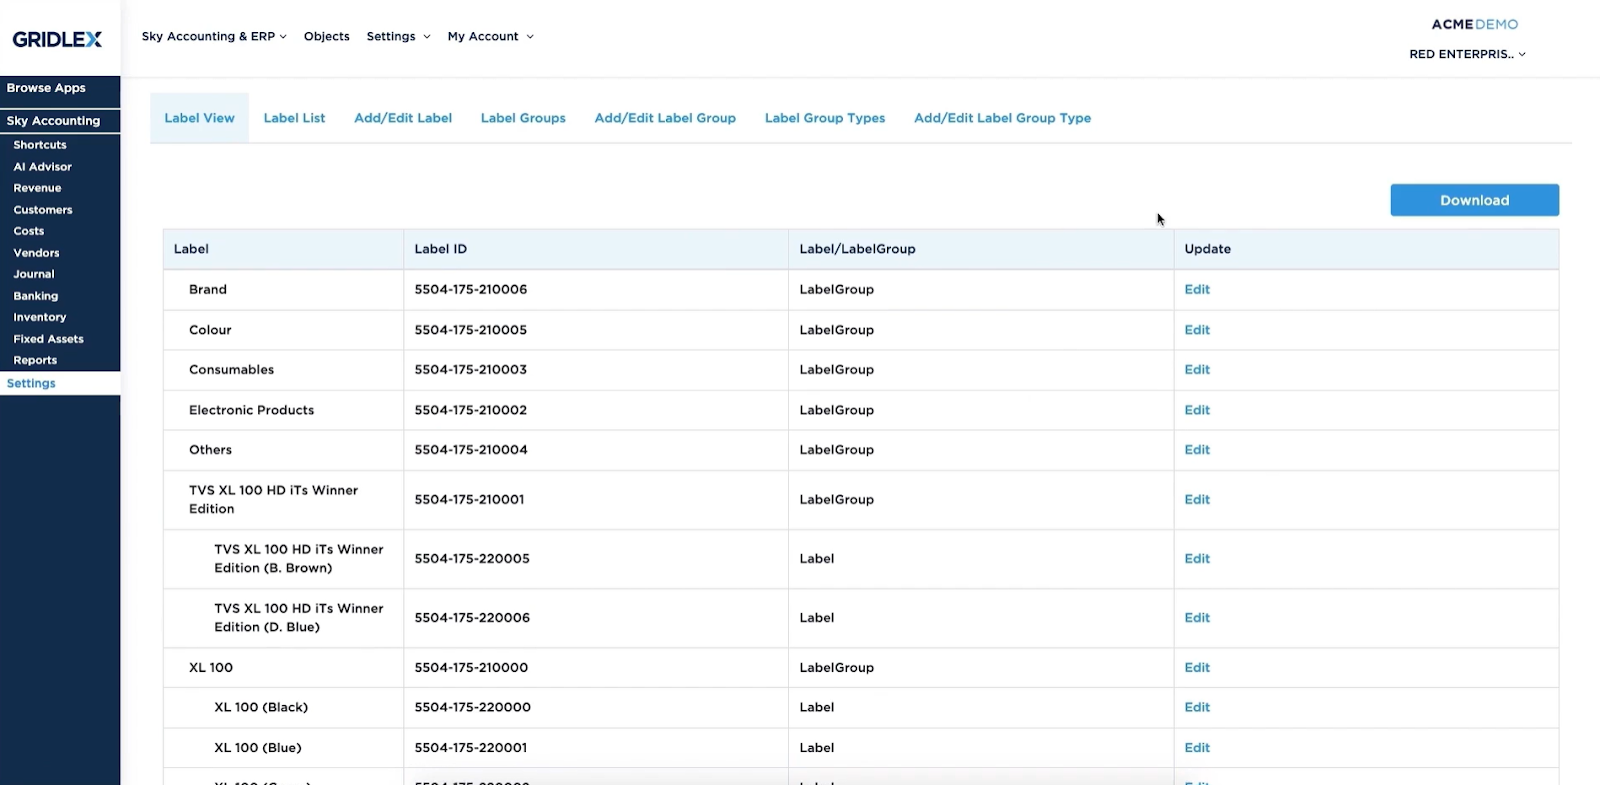
Step 5: To view the complete list of Labels, click on “Labels View.” Once you have finished viewing the report, you can select the “Download” button to download the report in PDF format.
Manage Divisions
Step 1: Login into your Gridlex App Suite Account and choose the entity of your choice. Select the “Setting” tab and click on “Manage Divisions.”

Step 2: Click on “Add/Edit Division Type” to add a division of your choice. Create division type name and division type description.

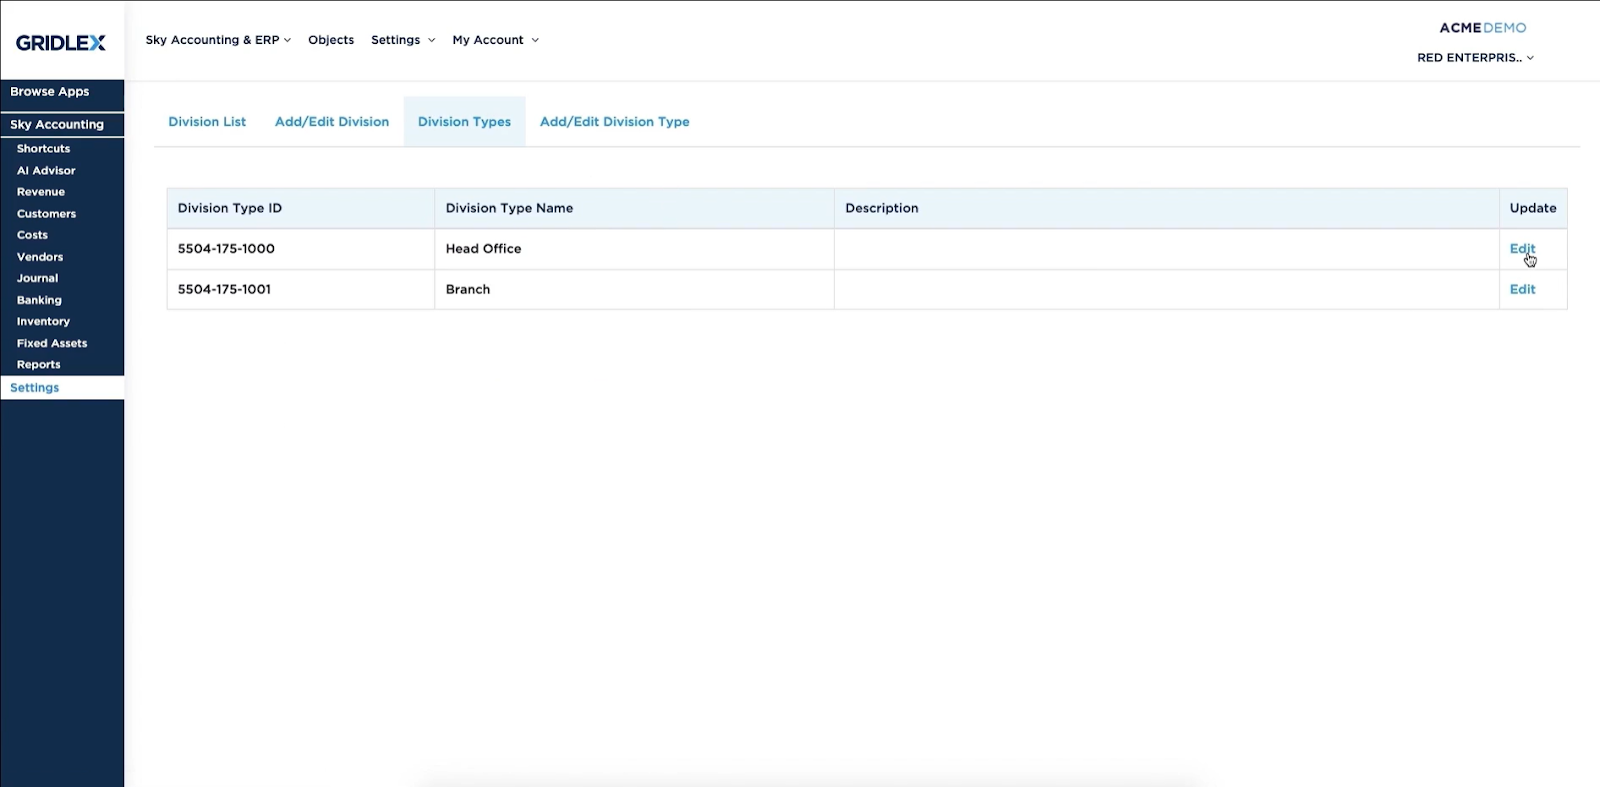
Step 3: Go to “Division Types” to view the list of Division types. If you want to edit the division type, go to “Label Group Type” and click on “Edit” to revise the data.
Step 4: Go to “Add/Edit Division, to create/edit the Division name, Division type, and Division parent.

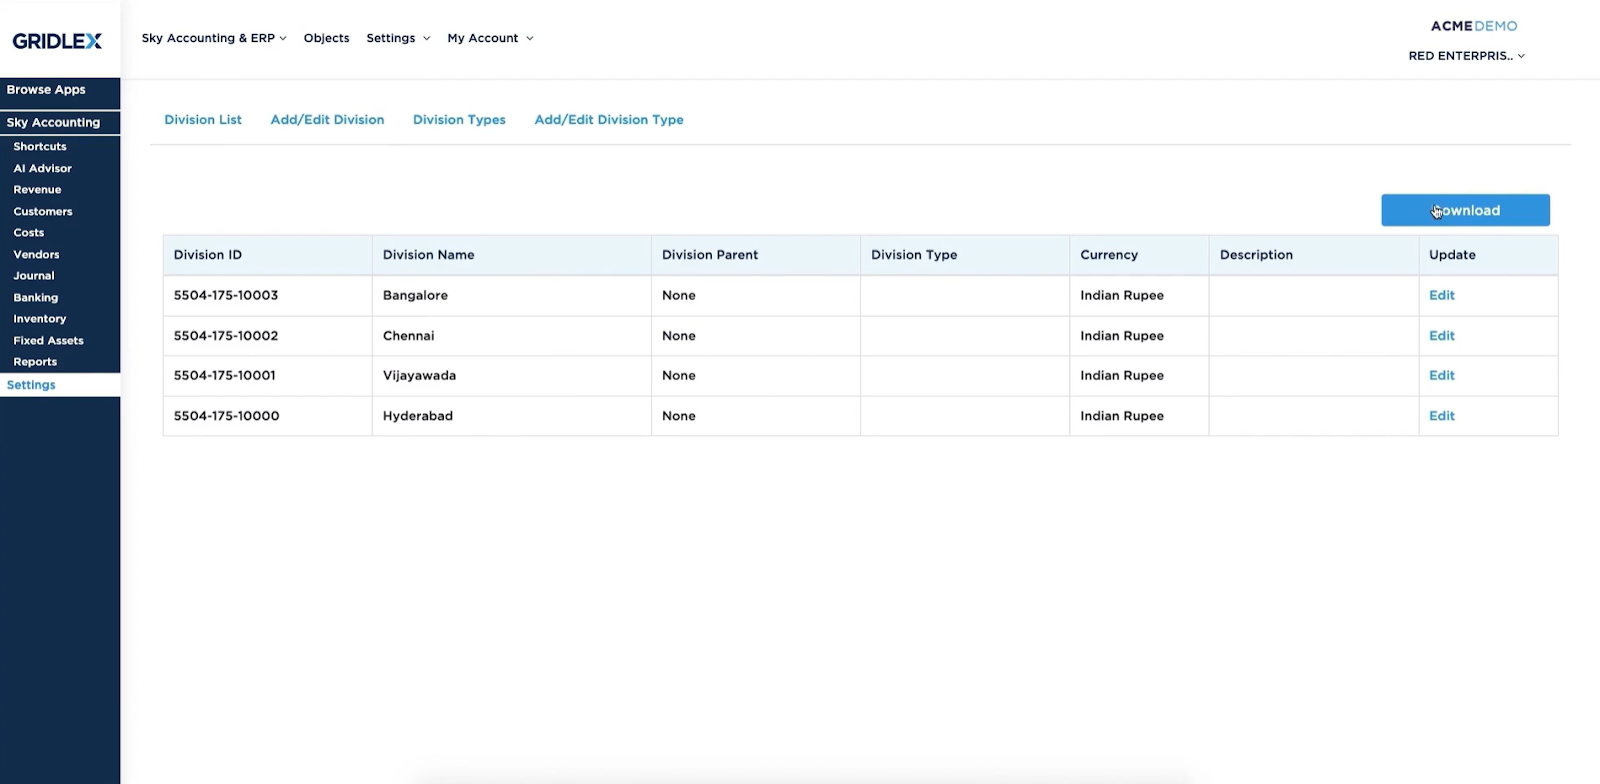
Step 5: To view the complete list of Divisions, click on the “Divisions List.” Once you have finished viewing the report, you can select the “Download” button to download the report in PDF format.
Quick Tip
Gridlex Sky offers a list of shortcuts for common tasks. By clicking on the “Create Centers, Divisions, and Label to better organize your business” tab, users can easily navigate to this page without having to scroll through other sections.